Pillow python tutorial for beginners
Pillow python tutorial for beginners: Python pillow image library is used for image processing and learns how to use a pillow for basic image processing operations. The PIL is the python imaging library that will add many images to the python.
The pillow is a fork of PIL as it adds user-friendly features.
The python imaging library is an image class that is defined in the module with the same name.
They will also provide a python interpreter with image editing capability.
We can add the support for the opening, manipulating and saving the images.
The identifiers will read a large number if the formats and support are restricted to interchange and presentation formats.
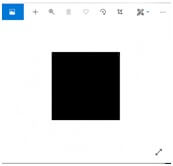
PIL.Image.new ():-
The method will create the image with mode and size.
The size is given by (width, height) in terms of pixels.
We will use color names and the argument is omitted.
Installation of pillow:-
Pip install pillow
Syntax:-
PIL.Image.new (mode, size)
PIL.Image.new (mode, size, color)
Parameters:-
- Mode:-It is used for new images and it is as RGB, RGBA.
- Size:-The 2-tuple will contain the height and width in pixels.
Color:-Which color is used. - Return value:-Image object.
Example:-
Import PIL
Im=PIL.Image.new (mode=”RGB”, size= (200,200))
Im.show ()
Output:-

How to use a pillow Python to manipulate image:-
The first thing is to download the image.
If we have a picture to use then we skip the first step.
We use the standard test image called “lenna” or”lena”.
Using pillow:-
We create a class in many ways by loading the images from files and processing them.
From PIL import Image
We access the function as,
Myimage=Image.open (filename)
Myimage.load ()
1. Load image:-
While loading an image from a computer we use “open” method and identify the file.
We identify the file using the myfileload () and after loading, we can do many things with it.
We load the image using the try/except method.
Example:-
From PIL import Image, ImageFilter
Try:
Original=Image. open (“Lenna.png”)
Except:
Print”Unable to load image”
The open () function is used to read the file.
2. Blur an image:-
Here we load an image from the hard drive and blur it.
Example:-
From PIL import Image, ImageFilter
Try:
Original=Image. open (“Lenna.png”)
Blurred=original, filter (ImageFilter, BLUR)
Original.show ()
Blurred.show ()
Blurred. Save(“Blurred.png”)
Except:
Print”Unable to load image”
3. Creating thumbnail:-
They are reduced in size of pictures but still contain the import aspect of an image.
From PIL import Image
Size= (128,128)
Saved=”lenna.jpeg”
Try:
Im=Image.open (“Lenna.png”)
Except:
Print”unable to load image”
Im.thumbnail (size)
Im.save (saved)
Im.show ()
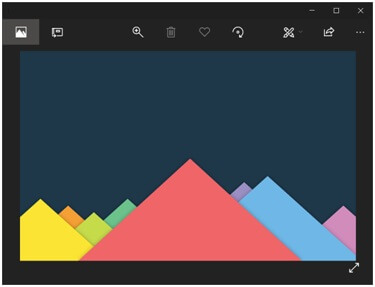
Display image:-
From PIL import image
Im=Image.open (“sample-image.png”)
Im.show ()
Output:-

Python pillow resize an image:-
We use the resize () method of PIL.Image class and pass parameters like image size, pixel, and resampling and box region.
Syntax:-
Image.resize (size, resample=0, box=None)
Here,
Size:-it is passed as the tuple and requested for resulting output image after resize.
Resample:-used for resembling as optional and pass,
PIL.image.NEAREST
PIL.Image.BOX
PIL.Image.HAMMING
PIL.Image.BICUBIC
PIL.Image.LANCZOS
Python pillow adjust image brightness:-
We have to read the image by image. open ().
Then we create the ImgaeEnhance.brightness () method.
Example:-
From PIL import Image, ImageEnhance
Im=Image. open (“sample-image.png”)
Enhancer=ImageEnhnace.Brightness (im)
Factor=1
Im_output=enhancer.enhance (factor)
Im_output.save (‘original-image.png’)
Factor=0.5
Im_output=enhancer.enhance (factor)
Im_output.save (‘darkened-image.png’)
Factor=1.5
Im_output=enhancer.enhance (factor)
Im_outputsave (‘brightened-image.png’)
Original Image:-

Brightened Image:-

Adjust Image Contrast:-
We have to read the image using the Image. open function.
Then create the ImageEnhance.contrast () enhancer for image.
Then we enhance the contrast () using the enhance () method.
Example:-
From PIL import Image ImageEnhance
Im=Image. open (“sample-image, png”)
Enhancer=ImageEnhance.Brightness (im)
Factor=1
Im_output=enhancer.enhancer (factor)
Im_output, save (“original-image.png”)
Factor=0.5
Im_output=enhancer.enhancer (factor)
Im_output=enhancer.enhancer (factor)
Im_output.save (‘brightened-image.png’)
Original Image:-

The contrast of Image:-

I enjoyed to try out Pillow python tutorial for beginners, and I will write more posts about it in the future.


